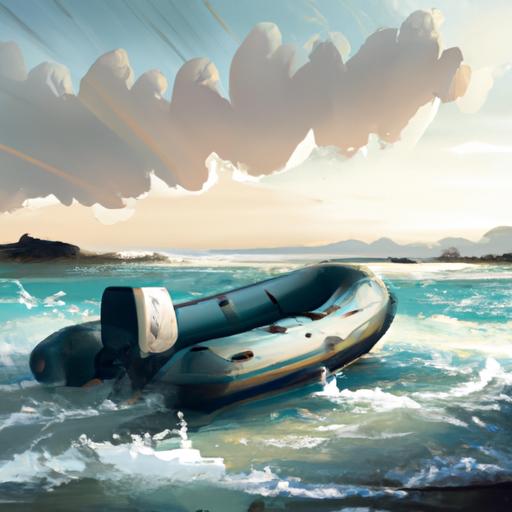
Do you own an inflatable PVC boat? Are you worried about how to maintain and repair it? If so, youre in the right place.
In this comprehensive guide, well cover everything you need to know about repairing your PVC inflatable boat.
From identifying the source of the issue to securing all seams and edges, well make sure your boat gets back in the water with ease.
Plus, well offer some tips for easier repairs and recommended maintenance practices to keep your boat in good condition.
Read on to learn more!
Table of Contents
Short Answer
Repairing a PVC inflatable boat requires the use of a patch kit, which usually includes a patch, glue, and a brush.
First, clean the area of the boat that needs to be patched, then apply the patch to the area and rub it down to ensure it is stuck.
Finally, use the brush to spread the glue over the patch and leave it to dry for several hours before inflating the boat.
Identifying the Source of the Issue
The first step in repairing a PVC inflatable boat is to identify the source of the issue.
This can be difficult if the problem is not immediately apparent, but it is essential to have a good understanding of the cause before attempting any repair.
If the boat is filled with air, it is best to fill a bucket with water and submerge the boat in it.
This will allow you to identify any leaks or holes.
Additionally, inspect the boat for any signs of wear or damage, such as cracks, tears, or punctures.
If the boat has been stored for an extended period of time, it is important to check for any dry rot, which can cause damage to the fabric and seams.
Once you have identified the source of the issue, you can move on to the next step.
Getting the Required Supplies

When it comes to repairing a PVC inflatable boat, the first step is to make sure you have the right supplies.
PVC inflatable boat repair kits typically include a patch material, a repair glue, and a patch adhesive.
Depending on the size and severity of the damage, you may also need scissors, a utility knife, and/or a sanding block.
Additionally, you should have a clean, dry cloth to wipe away any residue after the repair is complete.
Additionally, make sure to have a large, flat work surface to work on.
This will ensure that the patch is applied evenly and securely.
Finally, make sure to wear protective gloves and eyewear when handling the repair materials.
Repairing Small Holes and Tears
When it comes to repairing a PVC inflatable boat, the first step is to identify the source of the issue.
If the problem is a small hole or tear, then patch kits can be used to make the repair.
Patch kits are readily available at marine stores, and they come with the necessary materials and instructions to make the repair.
Before applying the patch, make sure that the area is clean and dry, and that the edges of the hole or tear are firmly sealed.
Once the area is prepped, the patch kit can be used to apply the patch.
The patch should be applied in several layers, allowing it to dry in between each application.
The patch should overlap the edges of the hole or tear to ensure a secure seal.
It is important to make sure the patch is applied evenly and firmly, as any imperfections will weaken the repair.
Once the patch is fully dry, the repair is complete.
In addition to patch kits, there are also specialty sealants that can be used to make small repairs.
These sealants are usually a one-step process and dry quickly, making them a great option for quick repairs.
However, it is important to note that these sealants are not as strong as patch kits, and should not be used for larger damages.
Replacing Damaged Areas

Once the source of the damage has been identified, the next step in repairing a PVC inflatable boat is to replace any damaged areas.
If the damage is minimal, patch kits can be used to patch up small holes and tears.
However, if the damage is more significant, it may be necessary to replace the entire area.
When replacing a damaged area, the first step is to carefully remove the damaged area.
This can be done with a sharp knife or scissors, depending on the size and shape of the damaged area.
Once the damaged area has been removed, a new patch can be inserted.
If the patch is a bit too large, it can be trimmed down to size.
When inserting the new patch, its important to make sure that all edges and seams are secure.
This can be done by using a combination of adhesive and heat.
A heat gun can be used to heat up the edges of the patch, while a waterproof adhesive can be used to secure the patch in place.
Once the patch is secure, its important to let it dry completely before returning to the water.
Once all patches and repairs are complete, the PVC inflatable boat should be inspected thoroughly.
Its important to look for any signs of weakness or damage, as well as any leaks or weak seams.
If any of these are found, they should be addressed before returning to the water.
With the right supplies and some patience, repairing a PVC inflatable boat can be a breeze.
Securing All Seams and Edges
Securing all seams and edges is the final step in repairing a PVC inflatable boat.
After any necessary patches have been applied, it is important to make sure all areas of the boat have been securely sealed.
This will help to prevent any future leaks or other damage.
To secure the seams and edges of a PVC inflatable boat, first clean the area with soap and water to remove any dirt or debris.
Next, check for any loose seams or raised edges that may need to be trimmed down.
Once the area is clean and smooth, use a heavy-duty adhesive glue to apply a protective layer over the seams and edges, ensuring that all areas are securely sealed.
Finally, let the glue dry and cure for at least 24 hours before returning the boat to the water.
This will give the adhesive enough time to set, providing the best possible protection.
Following these simple steps will help to ensure that the boat is safe and secure for many years of water adventures.
Tips for Easier Repairs

When it comes to repairing a PVC inflatable boat, it is important to have the right supplies and to be patient.
Having the right supplies can make a big difference when it comes to a successful repair.
Patch kits are a great option for small holes and tears, but for bigger damages, it may be necessary to remove the damaged area and replace it with a new patch.
Additionally, it is important to make sure that all seams and edges are secure before returning to the water.
One helpful tip is to use a patch that is slightly larger than the damaged area.
This will help ensure that the patch is firmly adhered and will last longer.
Additionally, it is important to use a good quality adhesive to help secure the patch.
Be sure to read the instructions carefully and follow them closely to ensure a successful patch job.
In addition to using the right supplies, patience is also key when it comes to repairing a PVC inflatable boat.
Taking the time to properly identify the source of the issue and to make sure that all seams and edges are secure will help ensure that the repair is successful and that the boat is safe to use.
Overall, with the right supplies and some patience, most repairs can be completed easily.
Following these tips can help make repairing a PVC inflatable boat a breeze.
Recommended Maintenance Practices
In addition to providing a convenient and affordable way to enjoy the water, PVC inflatable boats require regular maintenance to ensure they stay in top condition.
To keep your inflatable boat in prime condition, its important to inspect it regularly for signs of wear and tear.
Look out for any punctures, holes, or tears in the material, and patch them up as soon as possible.
Additionally, regularly check all seams and edges to make sure they are secure.
You should also ensure that any drain plugs are tightly secured to prevent water from entering the boat.
Another important maintenance practice is to clean the boat after every use.
This will help to prevent the accumulation of dirt and debris, which can lead to damage over time.
Its also important to store the boat in a cool, dry place when not in use.
This will help to prevent the material from becoming brittle and cracking.
Finally, make sure to inspect the air valves and pressure relief valves to ensure they are in working order.
By following these simple maintenance practices, you can keep your PVC inflatable boat in great condition for years to come.
Final Thoughts
With a bit of effort and the right supplies, repairing a PVC inflatable boat can be a relatively easy process.
By identifying the source of the issue, repairing small holes and tears, replacing damaged areas, and securing all seams and edges, you can have your inflatable boat back in the water in no time.
To ensure your boat stays in good condition, keep up with recommended maintenance practices and inspect regularly for any damage.
Now that you know how to repair a PVC inflatable boat, you’re ready to get back out on the water!