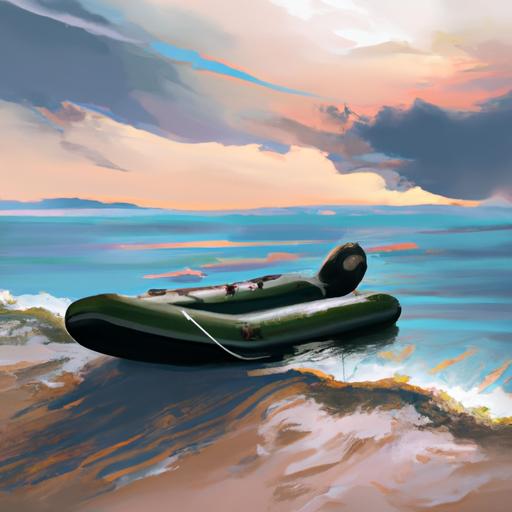
Are you looking for a reliable and cost-effective way to repair and glue an inflatable boat? Whether you’re new to boating or a seasoned sailor, understanding how to properly glue an inflatable boat can save you a lot of time and money.
In this article, we’ll cover four proven methods for gluing an inflatable boat, as well as some of the benefits of owning an inflatable boat and the steps you need to take to properly prepare the boat for gluing.
So, let’s get started and learn how to glue an inflatable boat the right way!
Table of Contents
Short Answer
Inflatable boats can be glued using a flexible polyurethane-based adhesive.
Clean the area to be glued with rubbing alcohol and allow to dry.
Apply a thin layer of adhesive to both surfaces, wait a few minutes for the adhesive to become tacky, then press together and hold in place for a few minutes.
Allow the adhesive to cure for at least 24 hours before using the boat.
What is an Inflatable Boat?
An inflatable boat is a type of boat that can be quickly and easily inflated and deflated with an air pump.
Inflatable boats are great for water sports, lake cruising, fishing, and river rafting.
They are lightweight and easy to transport, making them a great option for outdoor adventurers.
Inflatable boats are made from a variety of materials, including rubber, PVC, and Hypalon.
These boats are designed to be durable and withstand the wear and tear of daily use.
They are also more affordable than traditional boats, making them a great choice for those on a budget.
Benefits of an Inflatable Boat

Inflatable boats are an increasingly popular choice for those who want to explore the waters.
They are lightweight, easy to transport, and highly affordable compared to traditional boats.
Inflatable boats also offer several other advantages, such as being able to deflate and store them in a small space and being able to take them on trips due to their light weight.
In addition, inflatable boats are often more stable than traditional boats, allowing for more comfortable rides.
Finally, inflatable boats are often made of durable materials, making them highly resistant to punctures and tears.
With all these benefits, it is no wonder why so many people are choosing to use inflatable boats.
Preparing the Inflatable Boat for Gluing
Preparing the inflatable boat for gluing is the most important step in the process.
The area of the boat that needs repair must be thoroughly cleaned with a damp cloth before any glue is applied.
This will help to remove any dirt, debris, or other contaminants that could interfere with the glues ability to stick.
It is also important to ensure that the area is dry before moving on to the next step.
Once it is clean and dry, the area should be prepped with a putty knife to create a smooth surface for the glue to adhere to.
This will help the glue to form a strong bond with the boats surface.
Finally, it is important to make sure that the area is free of any air bubbles, as these can weaken the bond and cause the glue to fail.
Once the area is ready, the glue can be applied.
Choosing the Right Glue

Choosing the right glue for your inflatable boat repair project is essential for ensuring a successful repair.
Different types of glue work better on different materials, so make sure to read the label carefully and choose a glue that is specifically designed for the material of your inflatable boat.
A good all-purpose adhesive is often suitable for most inflatable boat materials.
When choosing a glue, look for one that is waterproof, flexible, and long-lasting for the best possible results.
Specialty glues are also available for inflatable boat repair projects, but these can be more expensive and harder to find.
Applying the Glue
When it comes to applying glue to an inflatable boat, there are a few key steps that must be taken to ensure a successful repair.
Before applying the glue, it is important to thoroughly clean the area of the boat that needs repair.
This can be done with a damp cloth, which will remove any dirt or debris that can prevent the glue from properly adhering to the boat.
Once the area is clean, it is time to apply the glue.
Depending on the type of glue being used, it may need to be mixed with a catalyst or activator before it is ready to be applied.
Once the glue is mixed, it should be spread evenly over the area of the boat that needs repair with a putty knife.
This will ensure that the glue is evenly distributed and that no air bubbles are created.
Once the glue is applied, the boat should be inflated and the area should be tested for any further damage.
If all looks good, the area is now ready for use!
Curing the Glue

Once the glue has been applied to the area of the inflatable boat that needs repair, it is important to ensure that it is fully cured.
This is done by allowing the glue to dry completely, usually at least 24 hours, depending on the type of glue used.
It is also important to follow all of the manufacturers instructions for use, as this will ensure that the glue is applied properly and will last.
The curing process of the glue is essential to the success of the repair, as it ensures that the adhesive is able to form a strong bond with the inflatable material and provide a lasting seal.
If the glue is not completely cured, it will not be able to provide the necessary protection from water and air leaks.
Additionally, any areas that are not completely cured may become weak over time and cause the repair to fail.
Once the glue has been applied and allowed to cure, it is important to test the area of the inflatable boat for any further damage.
This can be done by gently pressing on the repaired area with your fingers.
If the area feels weak or the glue does not seem to be holding, it may be necessary to apply another layer of glue and allow it to cure again.
Additionally, it is important to make sure that the area is completely dry before re-inflating the boat, as any moisture will prevent the glue from bonding properly.
Finally, it is important to remember that glue repairs may not be as strong as the original material, so it is best to take extra precautions when using an inflatable boat with a repaired area.
When possible, it is best to avoid sharp objects, large waves, and other sources of excessive stress to the repaired area.
With proper care and attention, a repaired inflatable boat can provide years of enjoyment on the water.
Testing the Repair
Once the glue has been applied and dried, its important to test the repair to make sure it is secure.
The best way to do this is to slowly and evenly inflate the boat until it is at its normal operating pressure.
This will help to ensure that the glue is strong enough to hold the repair in place.
After the boat has been inflated, carefully inspect the area and test it for any further damage or weak spots.
If any are found, the repair may need to be redone.
Additionally, its important to check the boat for any air leaks around the repair.
If any are detected, the repair will need to be done again.
Once the repair has been tested and inspected, the boat can be used as normal.
Final Thoughts
Gluing an inflatable boat is a great way to fix any tears or holes in the material.
While the process may seem intimidating, these four proven methods make it easier to understand.
With proper preparation, choosing the right glue, and applying the glue correctly, you can be sure that your inflatable boat will be ready for hours of fun on the water.
So dont wait start repairing your inflatable boat today!