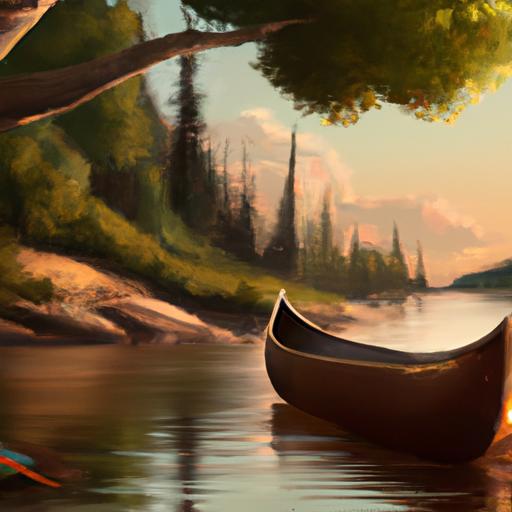
Making a dugout canoe is a great way to explore nature, and with the right tools and instructions, you can easily embark on this ancient tradition.
In this step-by-step guide, youll learn how to select the right log, prepare it, hollow it out, shape it, make it waterproof, and give it the perfect finishing touches.
Youll also learn how to properly test out the canoe for the best results.
Get ready to set sail on your own bespoke dugout canoe!
Short Answer
To make a dugout canoe, you will need to begin by selecting a large log.
The log should be large enough to fit a few people.
The log should be cleaned of any bark and should be smoothed out.
Next, you will need to hollow out the log using a variety of tools, such as an adze or an axe.
After the log is hollowed out, you will need to sand it down to give it a smoother surface.
Finally, you can seal the canoe with oil or paint to protect it from the elements.
Selecting the Right Log
When it comes to making a dugout canoe, the right log is essential.
The ideal log should be straight-grained and have minimal knots.
This is because the knots can weaken the wood and make it more susceptible to damage.
It is also important to choose a log that is of a suitable size and weight.
A larger log will be harder to carve and will require more strength to move, so it is best to start with a smaller log for a novice builder.
Additionally, the log should be free of rot and disease, as these can also weaken the wood and make it more prone to damage.
A log that has been seasoned for at least a year will also be easier to work with, as it will have less moisture content.
Preparing the Log

Before you can make a dugout canoe, you need to find a suitable log.
Look for a straight-grained log with minimal knots, as this will be the easiest to carve.
The log should also be of a size that is manageable and appropriate for the canoe you are making.
Once youve found the right log, youll need to secure it in place.
This is important for safety, as you dont want the log to move while you are carving it.
You can secure the log in place by using a few logs, wedges, and stakes.
After the log is secured, you can begin to shape it into the desired canoe shape.
You will need two main tools to carve the log: an axe and adze. Using the axe, you can remove large sections of the log to create the general shape of the canoe. Then, you can use the adze to refine the shape and smooth out any rough edges. Make sure to take your time and be precise with your carving. Its also important to wear safety equipment, such as eye protection, when using these tools.
Once you have created the desired shape of the canoe, you will need to seal the inside with tar or wax.
This will make the canoe waterproof and ensure it is safe to use on the water.
Make sure to apply the tar or wax evenly, and let it dry completely before testing the canoe on the water.
Hollowing Out the Canoe
Once you have chosen a suitable log, its time to start hollowing out the canoe.
To do this, youll need an axe and an adze.
An axe is a sharp tool with a long handle and a curved blade used for chopping and splitting wood.
An adze is an angled tool with a long handle and a flat blade used for carving and sculpting wood.
Start by using the axe to make a wedge-shaped cut along the length of the log.
This cut will help weaken the wood and make it easier to hollow out.
Then, use the adze to begin carving the inside of the log.
Work slowly and carefully, removing small amounts of wood at a time.
As you carve, use a straight edge to measure the depth and ensure that the inside of the canoe is uniform.
If youre feeling brave, you could also try using a chainsaw to carve out the canoe.
However, this method requires patience and skill, as its easy to accidentally remove too much wood or create an uneven interior.
If youre a beginner, we recommend sticking to the traditional method of using an axe and adze.
Once you have hollowed out the canoe, you can start shaping it into the desired shape.
Use the adze to shape the edges of the canoe and create a rounded, streamlined design.
With patience and practice, you can create a beautiful, traditional dugout canoe.
Shaping the Canoe

Shaping the Canoe is one of the most important steps in creating a successful dugout canoe.
To begin, select a suitable log with a straight grain and minimal knots.
This will ensure that the canoe is strong and durable.
Next, use an axe and adze to hollow out the inside of the log.
An adze is an ancient tool with a curved blade used for carving and shaping wood.
This tool is perfect for hollowing out the inside of the log and giving it the desired shape.
Use the axe to shape the outside of the log into the desired shape.
Take care to ensure that the sides of the canoe are even and the edges are smooth.
Finally, use a hand plane to smooth out any rough patches or bumps.
Once the log is shaped into the desired shape, it is ready to be sealed.
Making the Canoe Waterproof
Once the canoe has been hollowed out and shaped to the desired form, it is time to make it waterproof.
This is an important step, as a canoe that is not properly sealed will be prone to taking on water and leaking, which can be dangerous.
The most traditional method of waterproofing a dugout canoe is by using tar or tree sap.
This can be done by melting down the tar or tree sap and then applying it to the inside of the canoe.
To ensure that it is properly sealed, the tar should be applied in several layers and allowed to cool and dry between each application.
This will help ensure that there are no gaps or leaks in the waterproofing.
Another method of waterproofing a dugout canoe is to use a wax-based sealant.
This is less traditional than using tar or tree sap, but it can be just as effective.
The wax sealant is applied in a similar manner as the tar, with multiple layers being applied and left to dry between each layer.
This will help ensure that the canoe is completely waterproof and will not take on any water.
Finally, it is important to test the canoe to make sure that it is completely waterproof.
To do this, fill the canoe with water and check for any leaks.
If any water seeps out, the canoe needs to be resealed and tested again.
Once the canoe is completely waterproof, it is ready to be taken out onto the water!
Finishing Touches

Once you have carved and hollowed out your log, its time to add some finishing touches to make your canoe ready for the water.
To make your canoe waterproof, you will need to seal the inside of the log with tar or wax.
Start by heating the tar until it is liquid, then carefully pour it into the log, making sure it fills all the crevices and completely coats the inside surface.
Alternatively, you can use wax to seal the log – this will give your canoe a glossy finish and make it look more aesthetically pleasing.
Once youve sealed the inside, you can then use a saw to make a hole at the top of the log for the paddles and a lid.
You will also need to sand down the outside of the log to make it smooth and comfortable to sit in.
Finally, you can add some decorative touches such as paint or carvings to make your canoe stand out.
With these finishing touches, you will have a strong, durable and beautiful canoe that is ready to explore the waters!
Testing Out the Canoe
Once the canoe is finished, its time to test it out! Before taking it out on the open water, its a good idea to test the stability and buoyancy of the canoe in a controlled environment.
Start by finding a pond or lake with calm water and shallow edges.
To test the stability, get in the canoe and slowly move around to see how it handles.
Pay attention to any areas of instability or imbalance, and if needed, make adjustments to the shape or weight of the canoe.
To test the buoyancy, slowly fill the canoe with water from a bucket or cup.
If the canoe is still floating after being filled with water, its a good sign that its ready for the open water.
Once youre sure the canoe is safe and stable, grab your paddle and hit the water! With a bit of patience and skill, you can make your own dugout canoe and get out on the water!
Final Thoughts
Making a dugout canoe is a great way to explore nature and make something that will last for many years.
With the right tools, materials, and a bit of patience and skill, you can make your own dugout canoe and get out on the water.
So why not give it a try? Select a suitable log, prepare it, hollow it out, shape it, waterproof it, and finish it off with some final touches.
Then, take your new canoe out for a spin and enjoy the adventure!